Football Cut-Out Sugar Cookies
November 30, 2012 6 Comments

It’s been an exciting, touchdown-filled month for the sales team at my company. For the month of November the other two sales managers and I organized a football/Thanksgiving themed contest across the entire sales department. While there are two football teams, each member contributes individually to their overall team score by the number of yards they gain based on their own sales achievements.


Both groups came up with a team name; The Dee Stroyers (the red and white team) and The Butterballs (green and yellow team). We (the managers) decorated our area and cubes to get everyone in the spirit and created a score board that’s hung up on the wall so everyone knows exactly who’s kicking ass and who needs to be kicked in the ass. 😛 Everyone’s eligible for weekly cash prizes and the MVP for each team will get a PTO day. Who doesn’t love cash and vacations, right?!

In light of the contest and because the holidays always inspire me to bake copious amounts of cookies, I baked football themed cookies for the team this past weekend and made sure to create a jersey for each teammate (12 team members total) with their initials on it.
Despite my mind harboring intense guilt for not spending time playing outside on a sunny, 75 degree day and instead toiling the afternoon away decorating cookies, it was so worth it. Not only was I happy with the results, but I’m also happy to honor the team with some of my own energy and effort considering how much they’ve put in this month.


I’ve actually been making these cut-out sugar cookies at least once a year and realized that I’ve never shared the recipe on my blog so figured that it’s about high time I do so here it goes:


You’ll first want to take your Earth Balance, cream it, then add the granulated sugar and mix it well.


Then put the egg replacer and water in a bowl and beat with a hand mixer on high speed until stiff peaks form. This does take a few minutes, so be patient.


Add the vanilla extract and egg replacer to the batter and mix well.


Add flour, baking soda, and salt and sift it together into the batter.


Mix the dough well and then portion it into four even balls and cover with plastic wrap. Place them in the refrigerator and chill for at least two hours or overnight.


After the dough has chilled, grab your rolling pin and, if you have a 1/4-inch spacer ring, place it on either end of your pin. If you don’t have one, it’s not the least bit necessary—just try to roll out the dough to roughly 1/4-inch think or more. I would not roll it out thinner as thicker cookies are essential for tastiness. To start, place the dough between two sheets of wax paper and start to smush it down with your hands. It will start to soften and become more pliable; then take the rolling pin to it.


Place the cookie cutters over the dough and press down, trying to maximize your cookie-packing pattern so that you don’t have to roll it out as many times. Ever so carefully peel the cut-outs from the wax paper and place them on a parchment covered baking sheet.
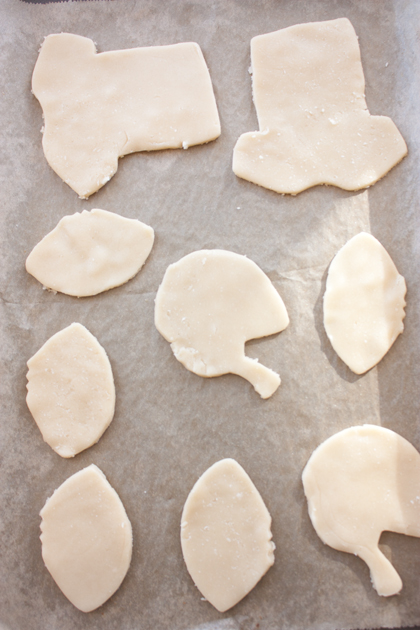
Place the cookie sheet in a preheated 350 degree oven for 8-12 minutes or until the bottoms are just barely starting to brown. I prefer under-baked to over-baked sugar cookies.


After you’ve rolled out and baked all of the cookies, you’re ready to begin making the icing. To do this, place 3 cups of sifted powdered sugar in a bowl, add the non-dairy milk and vanilla. Stir well until you achieve a drippy (but not too runny) consistency, like you see in the photo above on the right.


Portion the icing into as many bowls as colors you’re planning to use and then add your food coloring and mix well.


Frost the cookies and enjoy! And one quick tip—if you plan to layer the colors on top of each other like I did, I recommend waiting for the first color to completely harden before adding another, otherwise you risk the colors running together (unless you’re going to swirl them to create interesting patters).

Vegan Cut-Out Sugar Cookies
(I made alot of cookies since we have a lot of employees, but if you’re just making it for a small family, I’d cut this recipe in half… unless, of course, you enjoy having copious amounts of cookies around to enjoy during the holidays.)
Cookies
- 1 1/2 cups Earth Balance
- 2 cups granulated white sugar
- 4 egg replacer eggs
- 1/2 teaspoon vanilla
- 5 cups white baking flour
- 2 teaspoons baking powder
- 1/2 teaspoon salt
Icing
- 3 cups powdered sugar, sifted if clumpy
- 1 1/2 teaspoons pure vanilla extract
- 2 to 5 tablespoons (or more) non-dairy milk (I used vanilla unsweetened almond)
Preheat oven to 350 degrees.
Wet Ingredients: In a large mixing bowl cream Earth Balance and sugar. Add egg replacer and vanilla and mix well.
Add Dry Ingredients: Add sifted flour, salt, and baking powder. Combine to form the dough.
Prepare Dough: Section the dough into 4 even balls, cover with plastic wrap, and allow to chill in the refrigerator for at least 2 hours or overnight.
Cut Out Cookies: Roll the dough to a desired thickness (but don’t go thinner than 1/4 inch) and use cookie cutters to form shapes.
Bake: Place the cookies on a parchment-paper-lined cookie sheet and bake for 8-12 minutes or until they start to brown slightly. Cool on a wire rack before frosting.
Frosting: Place all ingredients in a bowl and stir to combine. Add more milk for a thinner consistency and less for a thicker, frosting-like consistency. Portion out the icing into as many bowls as colors you wish to use and add food coloring.
Assemble: Frost your cookies and enjoy!


We used to bake Santa-shaped sugar cookies for the holidays every year growing up. I’d take some for my class, and my two sisters took some to their classes as well. We’d make between 100 and 150 of these suckers every December– but so worth it! 🙂
PS: I just got the ‘all-clear’ on corn this week, so I’m planning to make your corn millet cakes later on this week. I’ll still have to modify the salsa a bit (no onion or garlic), but I can’t wait to try those tiny cakes!!
Oh my goodness, Dana! 100-150 cut-out cookies is quite the feat! But I bet that you all had a good time rolling, cutting, baking, and decorating them together. Those sorts of family activities are what the holidays are all about — at least for me. Such good memories!
And that’s awesome to hear you got the all-clear on corn! Wooohooo!! The corn millet cakes are so tasty and you could skip the salsa too if you like and use a different sauce. You could do a tomato based sauce like you would with polenta or you could do a black bean sauce too. So many options. But either way you go, I definitely recommend a sauce with them to add a bit of moisture and flavor interest.
The cakes are in the oven AS WE SPEAK! I had a taste of the mixture (because there was a bit leftover and I didn’t have enough room on my (small) cookie sheet to add another cake. From that bite alone, these look like a definite win.)
YAY!!! And I love that they’re A-OK for your elimination diet 🙂
Oh, the sadness. Marty reacted to the millet in the cakes, and I think I reacted to the leeks. 😦 They were SOOOOOO delicious (and attractive-looking), but I’ll have to retest in the future again.
(I subbed leeks in for the onions, because I failed onions when I first tried to reintroduce them. I was hoping that leeks would be distant enough to pass, but now I’m not so sure… The bloating was WORTH IT, though. Those cakes were super yum!)
Such a bummer to hear that you and Marty had a reaction, Dana 😦 I’m glad to hear they were tasty, but super sad that they caused you guys such discomfort. Yes, perhaps subbing for a different grain and another veggie if you want to give them another try in the future. I hope the rest of your elimination diet is going well and you’re able to nail down foods that cause a reaction. ((HUGS))