Weekend Fun with New Lenses


Amy

I’m in the market for a new lens, but I don’t know which one I want. Do I get a fixed lens or a zoom lens? L series, non-L series? f1.2 or f1.4, or 24-70 or 24-105?

Since I have zero experience with any lenses outside of the one my camera came with, I decided to rent a couple that I’ve been eyeing to give them a spin. After a lot of researching, I narrowed down my decision to these four:

Fixed

Zoom

This weekend I tested out the two fixed lenses. On Saturday I took some shots with the 1.2, which may as well be made out of $1,500 in gold because that sucker is heav-ey. I assume this has to do with the fact that it’s made out of the highest quality glass Canon produces…and perhaps a tanker…or maybe it’s that there are several additional larger lenses in it.

After heaving it off the table and attaching it to my camera, I took a few shots. Pretty much immediately I was like a giddy teenager on my first date. Being able to set my f-stop down to 1.2 after being confined to 4.0 (with my kit lens) for all of these years is so flippin’ exciting!

Amy Matias

So the first set that you’re seeing are all taken on Saturday with the 1.2 lens. I got together with my dear friends Amy, Marius (and their baby, Mathias), and John. We enjoyed brunch at Universal Cafe on an outdoor table basking in the morning light.

Afterwards while walking along the sidewalk a friendly little poodle greeted a curious Mathias. They both seemed to enjoy each other’s company and I think the poodle sensed Mathias’ interest in him as he kept running back to Mathias after greeting everyone else in our party.

While sitting on the sidewalk Mathias found all sorts of interesting items of which to entertain himself—like a bottle cap or the blades of grass growing between the cracks.

All of these are taken in the shade on a very sunny day, which is some of the best lighting for photography.

We then drove to the Marina to do a little hike along Crissy Field. We plopped Mathias in the park among these pseudo-dandelions (I’m not sure what type of flower they are) where Mathias was overly ecstatic by John showing him how to pop the top off of them.

The major challenge with these photos is that they are taken in the middle of the day with the bright sun overhead casting shadows across Mathias’ face. Not the best lighting for portrait photography.

After snapping the top off of dozens of flowers, we walked along the beach where Mathias was even more excited about the sand.

Crissy Field Beach

Before heading back to the car, we stopped by a cafe to grab some smoothies and snacks. That was Saturday.

On Sunday I switched to the 1.4.

While the 1.4 may not be made out of gold (so much lighter!), I feel like it works just as beautifully. To be honest, other than the weight and size, I didn’t notice that huge of a difference in the shots I was able to take with it. In some respects, it almost felt easier to get the shot I wanted with the 1.4. Here are some photos from Sunday with that lens.

Bumbles and Mo were fairly patient models that afternoon, while Clyde was more interested in running up and down the jungle gym for some strenuous exercise than posing for me.

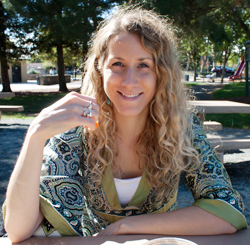
We then had lunch with our friend Mars and his girlfriend at the tasty vegan Mexican restaurant Gracias Madre. We sat at the outdoor tables and I took a photo of Alex and he took one of me before our friends arrived.

On our walk home we saw this adorable old couple holding hands while walking down the street and with my camera hanging around my neck I, of course, had to document it.

Old Couple Walking Down the Street

My final thoughts:

I realize that comparing the two is somewhat like comparing apples to oranges because they’re taken in different locations, with different subjects and very different lighting. However, I think it’s still possible to get a general idea of whether the 1.4 will be sufficient considering the $1,100 cost difference with the 1.2 and, right now, I’m not sold that the 1.2 is worth it.

Lastly, the first ten minutes of playing with the fixed lens was quite the adjustment (pun totally intended), but by the end of the weekend I had it down. It just takes a lot more effort to move your body to the right place…and sometimes when time is of the essence it can be a problem. That’s why both of these lenses are best suited for portraits where your subject isn’t moving a whole lot. The exception is food shots 😦 I know! Boo on that! The depth of field causes too much blur for the areas outside of the focus for my liking. So I don’t think either of these would work well for food photos, but maybe I just didn’t play around with them enough to figure it out.

Based on the outcomes of the photos, I’m pretty sure that I’d be perfectly happy with the 1.4 and saving myself $1,100.

Next weekend I’m testing the zoom lenses to see if I like them better and hopefully then I’ll know exactly which one I want to buy…but realistically, I know won’t be the case and I’ll probably be torn between two of them.

Highway 1 to Santa Cruz

Pacifica Foggy Beach

This past weekend was just plain gorgeous—warm and sunny. Exactly the way weather should be when I don’t have to be cooped up in the 11th story of an office building toiling away under fluorescent lights. Seeing such a glorious forecast, I had reserved a rental car earlier in the week so that Alex and I could explore a bit outside of the city.

Cliffs Highway 1 California

We headed down Highway 1 and as we came to the ocean near Pacifica we were greeted by a heavy layer of fog as you see in the first photo. However, by the time we got closer to Half Moon Bay it was starting to lift and we could finally see the mighty blue Pacific stretching far off into the horizon.

As we continued traveling south we came across Swanton Berry Farm, who are known for their amazing berries that you can pick yourself or buy pints already picked for you. They’re also well-known for the amazing jam they produce.

Lucky were we to able to sample (on an animal cracker—yes, animal crackers are vegan!) every variety they produce, from tayberry to olallieberry, loganberry, strawberry, and blackberry.

One of my favorite things about living in San Francisco is that you don’t have to drive very far outside of the city to be in “the country.” Swanton Berry Farm is my case in point. When you step inside their store it feels like you’ve stepped back in time—to a simpler place where you had to write letters by hand and drop them in a mailbox and subsequently wait days for it to arrive at your recipients door.  To a place where you had to spin a dial around a rotary phone to connect with a friend who lived far away. A place where the idea of a blog just may have been for those in the community as well as visitors to write their thoughts in an old fashioned notebook.

Not to mention a place where trust is so high that cashiers are superflous. But perhaps that’s just nostalgia for a time and place that never existed? Except here. Here at Swanton Berry Farm where no one mans the till and you pay for your jam or other goodies yourself. Where they provide you with a calculator to assist you with basic math in case your arithmetic is lacking. And where you can hand-write your thoughts to be shared with the public in a paper notepad.

Calculator

After purchasing some loganberry jam and heading back on the road we drove by some cows and had to stop and say hi to them—you think I’m joking, but I’m totally serious. These two guys were young steers and perhaps not fluent in English because they backed away after our initial greeting. Perhaps I should have tried “Hola!” instead? Spanish is a good second guess in these parts.

Then we came upon this amazing field of yellow flowers. They were so striking I had to pull over to take a photo and, as I was doing that, a very talkative red-winged blackbird landed on top of a branch and began to sing. After having just spent my mornings observing the red-winged blackbirds of Michigan, what I found most interesting was how different this little guy was compared to them—he had very large red shoulder pads while the ones I saw in Michigan had much more discreet orange and red markings along the inner part of their wings. Most often you couldn’t even see the red until they flew which is detailed in the two photos I have from that week in Michigan.

Yellow Flowers Red Wing Black Bird

After this brief bird-watching interlude we continued on to Santa Cruz where it was time to fill our bellies. We decided to get take out from Saturn Cafe and Cafe Gratitude and eat on the beach.

We stopped by Saturn first where Alex picked up a California veggie burger with fries and a mint chocolate chip shake and by the time we arrived at Gratitude we decided to eat in. Thankfully they were totally cool with him eating outside food in their restaurant.

I ordered a quinoa bowl with sesame ginger sauce and grilled seasonal veggies—the “I Am Fortified” dish. It was muy delicioso—filling and satisfying, yet light and refreshing. Cafe Gratitude’s serving dishes have little notes on them reminding you to reflect on all that you’re grateful for—to which I had plenty to say on this particular day.

After lunch, we drove along West Cliff Drive and saw this quaint little lighthouse, which happened to be the Santa Cruz Surfing Museum, though we didn’t know this at the time. The parking lot was completely full, otherwise we would have spent more time here exploring.

Lighthouse Santa Cruz

And besides it was to the beach we wanted to go! But….unfortunately, we weren’t the only ones who had that thought as a gazillion other people had the same idea in mind. It was crowded with a capital C. Look at all of those beach-goers. Sadly, the traffic en route to the beach was too much for me so I made the executive decision to find a park or some other natural area to enjoy the beautiful weather sans all of the people.

Santa Cruz Beach

But before heading inland we watched the athleticism of the local surfers. Santa Cruz is world-renowned for it’s surfing community and, in fact, is regarded as one of the best places in the world to catch some waves. Hence the surfing museum we saw earlier.

After our coastal tour we came upon Neary Lagoon Park and walked along the trails while observing all of the wildlife.

Have you ever seen a wood duck in person? No? Me neither. Until now. Not only did I get to see a wood duck for the first time, but I was able to see six, adorable little wood ducklings. Can I just say that among all of the beautiful, amazing things we saw that day, the wood duck and ducklings were the highlight for me. No question.

We also saw the usual mallards, many of them coupled like the ones below, but a lot of single males as well. It was like a duckville version of Michigan Tech where the males outnumbered the females four to one.

And no trip outside of the city is complete without a beautiful sunset as you’re coming over the Bay Bridge into San Francisco (we made a pit stop in Oakland to visit with some friends so we drove through the East Bay instead of coming from the peninsula).

It’s at this point that the intense love I have for SF magnifies, becomes overwhelming in my heart and I think to myself “I live here! This is my home and I can’t believe I get to live among such beauty every day!”

Sunset Golden Gate Bridge

Yummy Vegan Pancakes

Vegan Pancakes with Palm Oil Free Butter

When author and owner of Vegan.com, Erik Marcus, asked if I would be interested in taking on a photo shoot project for a groundbreaking new recipe from a well-known vegan cookbook author I was, naturally, ecstatic. I replied with an enthusiastic “YES!” without even knowing what the recipe was! So when he eventually sent the recipe including all ingredients and instructions, my boots began to shake and suddenly I became rather intimidated. The challenge was a palm-oil-free butter created by the genius chef Bryanna Clark Grogan and it appeared ever-so-complicated with all sorts of special ingredients. Liquid soy lecithin? Non-deodorized fair trade organic cocoa butter? All items not in my every day pantry and ones that I don’t have experience working with so the potential to mess it up was great. Plus I was running short on time and knew that I didn’t have days to play with it if I bombed on the first try.

Palm Oil Free Butter Ingredients

My fears were largely caused by the fact that I knew I wasn’t creating the butter and doing a photo shoot for myself. Other people were depending on me and expecting it to be fabulous. Pressure! Eeeek!

In the process of scrambling to get a silicone mold and acquiring all of the ingredients, I also knew that I had to figure out how I was going to plate and present the butter for the shoot. And one of the first foods that comes to mind when I think of butter is pancakes (right there behind toast). Who doesn’t love to slather butter all over their pancakes before dousing them with maple syrup? This is pure comfort food to the highest degree for me.

Vegan Pancakes with Palm Oil Free Butter and Maple Syrup

During an afternoon trip to Union Square and Sur La Table I successfully acquired all of the dishes and items I needed for a butter photo shoot and I’m happy to share the results of that shoot as this is one of the photos I sent and was used to feature this amazing new butter recipe:

Vegan Palm Oil Free Butter

As for the pancakes, this particular version has been in my recipe box for over ten years and is written on a pancake-batter stained notecard that I officially labeled as “Yummy Vegan Pancakes.” When I first went vegan I tried all sorts of different recipes tweaking them to my liking and landed on this particular one as a favorite that I consistently use. I hope you like it!

Pancake Ingredients

Yummy Vegan Pancakes

This yields roughly a dozen pancakes.

Ingredients

  • 1 cup white flour
  • 1 cup whole wheat or whole wheat pastry flour
  • 4 tablespoons baking powder
  • 2 teaspoons ground cinnamon
  • 1/4 teaspoon salt
  • 2 cups vanilla soy milk, almond milk, or any other non-dairy milk
  • 4 tablespoons vegetable or canola oil
  • 6 tablespoons applesauce
  • 1 teaspoon pure vanilla extract
  • additional oil for greasing the pan

Dry Ingredients: Combine dry ingredients (flour, baking powder, cinnamon, and salt) in a medium bowl and mix well.

Wet Ingredients: Add the soy milk, oil, applesauce, and vanilla to another medium bowl and whisk until well incorporated.

Combine: Add the wet ingredient mixture to the dry ingredients and stir until the batter is moistened. A few remaining lumps is A-okay—do NOT over mix the batter.

Cook: Heat a lightly oiled frying pan or griddle over medium-high heat and pour 1/4 cup of batter. Cook until the bottom is browned, flip, and repeat on the other side. Serve with delicious maple syrup, vegan butter, and berries.

Vegan Pancakes with Palm Oil Free Butter

Pinto Bean Hummus (ish) Dip

Pinto Bean Spread

I spent the last week at my mum’s house in the ‘burbs of a tiny town called Baraga. To give you an idea of what I mean by tiny, the L’Anse/Baraga metropolitan area roughly consists of 4,000 people. I graduated with a class of 46 students. While it’s not quite a one-room schoolhouse story, this is a decidedly small population of people. Not only that, the closest “big” city is Green Bay, which is a four hour drive away and if you want something more cosmopolitan you’ll need to drive six hours to Minneapolis or seven hours to Chicago. Furthermore, my mum lives outside of the tiny town of Baraga where her house sits on four acres of land and where she owns another 40 acres across the street.

Pinto Bean Hummus

It’s a six mile drive to the nearest grocery store so when you’re out of a particular food like I was that day, you’re SOL, in a way. It was hummus that I was looking to make as I had been craving it all day, but there was a problem—I was lacking a lemon. Yes, it was a single lemon that stood between me and a freshly whipped up batch of hummus. So I decided to improvise and create a creamy bean spread with a different bean and a few different ingredients. And happy was I when this spread turned out so awesomely, despite the minimal ingredients I had on hand.

As I sat relaxing in the beautiful bay window in my mum’s dining room eating my Pinto Bean Dip, I was able to observe an industrious little squirrel who enjoyed hoarding and gorging on sunflower seeds from the bird feeders. He repeatedly ran back and forth from his stash under the deck to the tree where the feeders hung. After all of his hard thiefery work, he was so pleased with himself that he just had to do a little jig.

Squirrel Jig

While he was congratulating himself on the deck, the blackbirds safely returned to the tree to snack on any seeds that may have fallen to the ground. Every few seconds another bird would land for a snack until the ground looked like this.

Red Wing Black Birds Michigan

But that didn’t last long as Mr. Squirrel became a little envious and launched himself towards the birds, which in turn provided us with this beautiful site of colorful feathered wings.

Red Wing Black Birds Flying Michigan

It wasn’t just blackbirds that we saw. That morning we were graced with the presence of an immense variety of birds. Who would think that you can see goldfinches and purple finches, blue jays, red-wing blackbirds, mourning doves, chickadees, sparrows, and rusty blackbirds all in a 10 foot radius in Michigan? There were moments where all of the birds were in the tree together, but most of the time the colorful finches, sparrows and chickadees would feed together, leave, and then a variety of blackbirds would show up and all feed together like school children attending their separate specified lunch breaks.

Finches Jays Song Birds Michigan

Pinto Bean Hummus (ish) Dip

Ingredients:

  • 1 can pinto beans, drained and rinsed
  • 2 tablespoons tahini
  • 1 tablespoon olive oil
  • 1 (to 2) teaspoon balsamic vinegar
  • 1/4 teaspoon of each paprika and cumin
  • salt and pepper, to taste

Puree: Throw all ingredients in a food processor and blend until smooth and creamy. Serve with fresh chopped veggies.

Note: While I thoroughly enjoyed this spread, Alex was not terribly fond of it, which is why I *had* to eat the entire dish myself…in one sitting. 🙂 All I’m getting at is that perhaps it’s not for everyone. I think that the vinegar what might have been what turned Alex off to it so if you’re not a huge fan of balsamic vinegar perhaps you want to start with a smaller amount and increase if you like it.

White Bean Hummus with Basil Pesto

Pesto White Bean Hummus

Does the world really need another hummus recipe? Yes. Yes, in fact, it does. Because while no bean can ever replace the beloved chickpea, sometimes you just need something different. A change of pace. That’s where the smooth and creamy white bean comes into play and works so well as a chickpea replacement in this dish.

White Bean Hummus Ingredients

It amazes me how many people consistently buy pre-made hummus from the store when it’s so ridiculously easy (and cheap) to make at home. The above photo shows all of the items you need to make this dish and once you’ve acquired and prepared them simply throw them in your food processor and whirl away until you get the creamy texture you see in the photo below.

A traditional way to eat hummus is with pita chips and you can buy them from the store or you can make your own. Just like hummus, these too are downright effortless to make and doing it yourself allows you to choose how much oil and salt you want to add.

Simply cut the pita bread in half and then in half again and once more until you are left with little triangles. Brush each one with olive oil and sprinkle with salt.

Pita Triangles

Then place them in a preheated 400 degree oven on a parchment lined baking sheet for about 8 minutes or until they’ve reached the crispiness you desire. Then serve them with this delicious white bean hummus.

Pesto Hummus Pita Chip

White Bean Hummus with Basil Pesto

Ingredients

  • 2 cans (or 4 cups cooked) white beans strained (I used a combination of cannellini and butter beans this particular time, but feel free to use whatever kind you like since there are so many varieties out there)
  • 2 tablespoons tahini
  • juice of 1 lemon
  • 1 clove garlic
  • water, as needed
  • salt, to taste

Puree: Place all ingredients in your food processor and process until completely smooth. You will need to stop the machine every so often to scrape down the sides of the bowl and add water as needed until you’ve achieved the right consistency.

Basil Pesto: Ingredients and instructions are listed here if you want to add this topping to your hummus. Even though it’s not necessary as the white bean hummus is delicious in it’s own right, the pesto adds an even greater kick if you’re feeling ambitious and excited to add that wonderful basil flavor.

Serving: Place the hummus in a dish, top it with the basil pesto, and serve alongside toasted pita triangles and/or chopped fresh veggies.

Pesto White Bean Hummus

Vegan Chocolate Marshmallow Surprise Cookies

Vegan Chocolate Marshmallow Surprise Cookies

Marshmallows and chocolate. In the shape of eggs. To my 5 year old mind, that’s what Easter was all about. For some reason, late March and early April is the only time of year you could find those chocolate covered marshmallows that came in styrofoam egg cartons. Of course there were peeps, but I never cared much for peeps. Actually, I’ve never been much of a plain marshmallow person ever; however, when you marry marshmallows and chocolate together that’s a whole nother story as it creates an irresistible combination to my palate.

Oh! And surprises! I can’t forget about surprises! Easter was all about surprises—from the surprise of where your Easter basket could be hidden to the mystery of what could possibly be hiding in your plastic Easter eggs.

So these cookies are a throw back to those Easter memories—a bit of chocolate enveloping a hidden marshmallow surprise.

Making these cookies is fairly easy. It just requires a couple additional steps with adding the marshmallow and the frosting. You first need to sift the dry ingredients in a medium bowl. This step is especially important if your cocoa powder is as clumptastic as mine was.

Next you need to cream the Earth Balance and sugar in your stand mixer for several minutes until they are well incorporated.

After it’s thoroughly creamed, put the Ener-G Egg replacer in a small bowl with the 2 tablespoons of warm water and then blend them together using hand beaters until it’s thick and foamy. When working with the equivalent of two or more eggs it’s quite easy to beat it to the point that you can create stiff peaks with it, but when using only one egg I find it difficult to get it to that stage. The foamy consistency of the middle photo below is about as thick as I can get a single serving. Add the “egg” and soy milk to the butter mixture and mix them for another couple minutes.

Next add the dry mixture in 1/2 cup batches until it is thoroughly incorporated and you have a batter that resembles the below photo.

Chocolate Cookies Dough

With a cookie scoop drop the cookies on a parchment lined cookie sheet spaced about an inch and a half a part.

Pop them in your preheated oven for about 8 minutes. The photo on the left is what they looked like before I put them in the oven and the one on the right is what they looked like after 8 minutes.

While they’re baking cut your marshmallows in half. Note that you can totally omit this step if you want a higher marshmallow to cookie ratio. The very first time I made these a couple years ago, I didn’t halve them and they turned out just as awesomely.

Immediately after they’ve baked for 8 minutes and you pull them out of the oven, place a marshmallow half in the center of each cookie. Place them back in the oven and cook for another 2 minutes until the marshmallow is semi-melted. The photo on the left is pre-baking of the marshmallow and the photo on the right is what it looks like after 2 minutes in the oven.

Place them all on a cooling rack and let them cool completely.

Melted Marshmallows

While the cookies are cooling you can make the frosting by melting the Earth Balance and cocoa powder in a small saucepan over medium heat.

Place the 3 cups of confectioners sugar in a medium bowl and add the melted chocolate. Wisk them together until completely smooth with no lumps.

Then drop a tablespoon or two on each cookie and spread. Let the frosting harden on the cookies before putting them in a sealed container for storage.

Frosted Cookies

Chocolate Frosted Cookies

Vegan Chocolate Marshmallow Surprise Cookies

Vegan Chocolate Marshmallow Surprise Cookies

Ingredients

  • 1 3/4 cup all-purpose white flour
  • 3/4 cup unsweetened cocoa powder
  • 1/2 teaspoon baking soda
  • 1/2 teaspoon salt
  • 1/2 cup Earth Balance, softened to room temperature
  • 1 cup granulated sugar
  • 1 1/2 teaspoons Ener-G Egg Replacer
  • 2 tablespoons warm water
  • 1/2 cup original soy milk (full fat and not unsweetened)
  • Dandies vegan marshmallows (you should be able to find these at most natural food stores)
Frosting
  • 3 cups confectioners sugar (sifted if super lumpy)
  • 6 tablespoons Earth Balance
  • 1/4 cup unsweetened cocoa powder
  • 1/4 cup soy milk (full fat and not unsweetened)
Directions
Preheat: Turn your oven on to 375 degrees.
Dry Ingredients: Sift the flour, cocoa powder, baking soda, and salt in a medium bowl.
Cream Butter: Place the softened Earth Balance and sugar into the bowl of  a stand mixer fitted with a paddle attachment and cream together for several minutes.
Combine: Slowly add the flour mixture a half cup at a time into the butter mixture and mix until they are well incorporated.
Bake: Using a cookie scoop so that you create evenly sized cookies, drop the dough about 1 1/2 inches apart onto a parchment paper lined cookie sheet. Bake for 8 minutes.
Add Marshmallows: After 8 minutes of cooking, pull the cookies out of the oven and slightly depress the center of each cookie while placing a halved marshmallow in the middle. Place the sheet back in the oven and cook for another 2 (to 2 1/2) minutes more. Pull them out of the oven and allow to completely cool on a wire rack.
Assemble Frosting: While the cookie are cooling, place the confectioner’s sugar in a medium bowl. Melt the Earth Balance and cocoa powder in a small saucepan over medium heat until completely smooth. Pour the melted chocolate mixture and soy milk into the bowl with the confectioners sugar and whisk together until there are no lumps.
Assemble Cookies: Drop a tablespoon or two of frosting on top of each cookie and let harden before storing in a sealed container.
Note: This yields about 2 1/2 dozen cookies.
Adapted from Martha Stewart’s Cookies

Vegan Chocolate Marshmallow Surprise Cookies

Dairy-Free Nut-Free Basil Pesto is the Best-o

Dairy Free Nut Free Pesto

I remember my first taste of pesto. It was a warm summer night on an island off the coast of Maine after I had just completed the 8th grade. My mom and I were on an epic, two week road trip along the East coast with my maternal grandmother.

There are a few memorable moments seared in my brain from that trip. Like when my grandmother told my mother that I was ungrateful after leaving my used towels strewn about the bathroom floor in our hotel room (oops! still feel bad about that!). Or when I had my first (and only!) lucid dream while napping in our rental house on Cape Cod as my mom attended a conference presented by Will Schutz (my cat’s name happened to be Schutz!)

Most of all, I remember trying pesto for the first time. We were having dinner at an old friend’s of my mom’s summer house and it first hit my olfactory senses as they were cooking dinner in the kitchen. I will never forget the feeling that strong basil aroma left in me and, to this day, whenever I smell that piquant herb it brings me back to that very moment in my life. Our hosts had prepared a lovely dish of pesto pasta and I remember the taste being just as remarkable, though surprisingly not as strong as the scent.

After that amazing night with pesto it wasn’t until years later when I was in college that I finally encountered it again. And ever since I’ve not let this heavenly dish go.

Basil

What’s remarkable is that I’ve found you don’t need to add much to pesto to create an amazing condiment. In fact, I think that the less you add, the stronger the basil flavor. Some foods play well with each other and can actually enhance the strength of each other’s flavor, but neither cheese nor nuts do that for basil.  I discovered this when I went vegan and started to omit the cheese. Also, at that time I was making my pesto with almonds because Alex is allergic to pine nuts. Soon after I tried it sans nuts entirely and found that I liked it even better. So here you have the only other players in addition to basil in this amazing pesto—lemon juice, olive oil, salt, pepper, garlic.

Pesto Ingredients

So few ingredients makes for a very fast meal. Throw them all in your food processor and blend away. I like using my mini processor for pesto since all of those fluffy basil leaves are reduced to this as soon as you turn on the motor.

Dairy Free Nut Free Pesto

Yes, all of that basil only produced this much pesto. It makes buying a few basil plants a worthy addition to your home garden.

Dairy Free Nut Free Pesto

A very easy way to enjoy pesto (besides pasta) is by toasting baguette slices in the oven…

and then smearing the besto pesto on them…

and then topping them with slices of fresh tomato.

Dairy Free Nut Free Pesto Toast with Tomato

Dairy-Free Nut-Free Basil Pesto

Ingredients

  • 4 cups fresh basil or one bunch, rinsed and trimmed
  • juice of half a lemon
  • 1 clove garlic, peeled
  • 1/4 cup extra virgin olive oil
  • water (if necessary to thin it out if you don’t want to use more oil)
  • salt and pepper to taste
Puree: Blend all ingredients in your food processor until it’s completely pureed.
Also, the amounts mentioned above are general guidelines, but you can always make your own additions and subtractions. Perhaps you want a super garlicky pesto then go ahead and throw in several cloves of garlic. Or maybe you enjoy a stronger lemon flavor then go ahead and squeeze the juice of an entire lemon into the processor. Use more or less olive oil to adjust the consistency. It’s totally customizable to what you’re feeling at that moment.
Enjoy!

Dairy Free Nut Free Pesto

Lemony Asparagus Artichoke Pilaf

As soon as asparagus shows up in the markets we all know that spring has definitively arrived. That moment emerged a number of weeks ago in San Francisco and I have been itching to make something with it ever since. I knew I wanted to do a pilaf with rice and lemon juice, and then the red pepper caught my eye at the store so I added that to my cart. I already had scallions in my fridge from another recent meal and knew they would make a great addition. So I thought I was all ready to make the dish when it struck me that I needed to add artichoke hearts. So back to the store I went.

Did you know that asparagus has magical powers. Oh, yes, it does! It can actually change the aroma of your urine—what other food do you know can do that? Moreover, not everyone has the ability to smell this transformation. Apparently, some people lack the gene to smell “asparagus pee,” while the rest of us (me included) can. For a long time I thought I was one of those people who lacked this gene; however, I later realized that was just because I never used to eat asparagus.

What’s interesting is that while only some people can detect asparagus-pee, I’m pretty sure I have yet to meet one of those people who can’t. Granted, my sample size is fairly small because I don’t talk about asparagus-pee with everyone I meet, but I’d say I know at least 20 people who have confirmed they have it and not a single person who doesn’t. So now I wonder what the ratio of asparagus-pee detectors to non-detectors there are in the world? How about you? Care to divulge whether you’re a detector or a non-detector? Or are you too shy or, as a European would say, prude?

Lemony Asparagus Artichoke Pilaf

Ingredients

  • 2 tablespoons extra virgin olive oil
  • 1 medium yellow onion, diced small
  • 2 cloves of garlic, minced
  • 14 (or so) asparagus spears, trimmed and cut into 1-inch pieces. Also, if your spears are very large and you have the time to peel them with a potato peeler, go for it. It makes them so tender!
  • 1 can artichoke hearts, chopped small
  • 1 red bell pepper, diced
  • 3 scallions, thinly sliced
  • 1 1/2 cups white rice
  • 2 1/2 cups water
  • 2 tablespoons lemon juice
  • salt and pepper
  • basil chiffonade (optional)
  • 1 1/2 cups edamame (optional, see note)

Cook Rice: I buy my rice in bulk and first like to rinse it in a sieve before placing it in the saucepan so after you’ve rinsed your rice, place it in a medium saucepan with the water over high heat. Put a lid on it and let it come to a boil. Once it’s boiling, turn down the heat and let it simmer, covered until all of the water has been absorbed about 15-20 minutes.

Saute Veggies: Meanwhile heat the olive oil in a medium saute pan over medium heat. When the oil is warmed add the onions and let them cook for about 7 minutes then add the garlic, asparagus, and artichoke and saute for another 2 to 3 minutes. Add the red pepper and saute for another 2 minutes. I prefer my veggies to be just barely cooked so that they still have some crunch in them. Mushy veggies in a rice pilaf = disgusting.

Toss: After the rice and veggies are cooked, you want to toss them together in a very large bowl. I poured in a little rice and then added some of the veggies, tossed them, poured a little more of each and tossed again and continued to do this until all rice and veggies were used and distributed evenly. I then added the scallions, lemon juice, and salt and pepper to taste. Lastly, I chopped up some fresh basil chiffonade and used that as a garnish, which went very well with the rest of the flavors in the dish, but you can totally leave it out if you don’t have any on hand.

**Note: If you want to turn this into a main dish for lunch or dinner, I suggest adding edamame to it. Just microwave or boil the edamame until heated through and then toss it in with the rest of the veggies and rice. You could even add it along with the asparagus and artichokes as you’re sautéing the veggies.

The Most Amazing One-Ingredient Ice Cream!

One Ingredient Banana Ice Cream

OMG! I’m obsessed! Obsessed with my newest discovery of one-ingredient banana ice cream. Yes, it’s just bananas and it’s as creamily smooth as soft serve ice cream.

I readily admit that I’m an ice cream addict. I’m pretty sure that it runs in my family as my brother and sister are severely afflicted as well so I think it’s safe to blame genetics on this misfortune.

The other night during one of my “CHRISTINA NEEDS ICE CREAM RIGHT NOW!” moments, I downed an entire pint of this stuff.

Nada Moo Maple Pecan Ice Cream

It was just what the doctor ordered! The only problem is that it was 10pm at night and consuming large amounts of sugar late at night keeps me up. So as I lay in bed well after midnight with my heart racing and not a wink of shut-eye in sight, my late night ice cream binge wasn’t looking like such a hot decision after all. Sadly, I know this about myself—how sugar affects me. And I clearly knew how late it was, yet could not stop eating the sweet creamy bliss. *sigh*

However, I’m thinking that this holy-mother-of-god-amazing invention of only-banana ice cream just might be my savior to late night cravings since fruit sugar (fructose) does not affect blood sugar levels the way that refined sugar (glucose) does!

One Ingredient Banana Ice Cream

Also, I must clarify. When I say ice “cream” I am, of course, referring to those of the non-dairy variety, which I dare say are better than the kind made from a lactating bovine. And with the overwhelming number of different companies producing such a wide variety of flavors it’s hard not to find at least a couple that you will love. You have choices from coconut to soy, almond, cashew, and rice based ice creams—so, yeah, lots to choose from. That Nada Moo kind I had the other night was awesome and I want to try other flavors of it, but my favorite kind that’s available nationally is Ginger Cookie Caramel Coconut Bliss. Sooooo good! Almond Dream is also another great brand and I actually love the straight up vanilla one. And if you’re in the Bay Area you cannot miss trying Scream Ice Cream—it takes the cake (heh) as best ice cream in the world and makes me salivate just thinking about it.

Somehow I missed the internet craze about this banana ice cream when it initially hit as it seems to have been all the rage a number of months ago. Apparently there is even a special banana ice cream making machine on the market. I don’t mean to knock it, but if you have a food processor this tool is completely superfluous and just another unnecessary kitchen gadget. You’re just blending bananas!

Toasted Coconut Banana Vegan Ice Cream

Ok. Ok. Enough chit chat. Onward with how to make this mother of all inventions!

You first want to slice some ripe bananas and stick them in the freezer until frozen (I like to wait a day to make sure they’re solid.) Then you throw them in your food processor.

Frozen Banana Slices

And start to process…you’ll see it turn to chunks and then start to get a bit smoother.

After blending a few minutes more it’ll start to get even creamier. I like to periodically turn on the machine and scrape down the side and spread out any chunks so that it gets evenly pureed.

I really love it at the stage in the above photo on the right, but you can continue blending until it’s even creamier like the one below.

Banana Soft Serve Ice Cream

I’ve noticed that if you don’t add any additional fruit to your ice cream, when you refreeze it maintains that soft creamy consistency. However, if you add strawberries, for example, the refrozen version becomes harder and tastes more like sorbet.

One Ingredient Vegan Banana Ice Cream

I also enjoyed topping it with chocolate sauce, strawberries, and toasted coconut.

Oy…clearly, I’m very inexperienced at photographing frozen foods because, in retrospect I realize that I should have frozen the plate and then let this trio sit in the freezer for a few minutes before photographing it—meltytown!

One-Ingredient Banana Ice Cream

Ingredients

  • at least 2 frozen bananas (or banana slices)
  • (optional) splash of vanilla

Puree Bananas: If they’re not already sliced, I recommend chopping up your frozen bananas before putting them in the food processer. Once you have slices, whirl away for several minutes until you have something akin to soft-serve ice cream. Feel free to sample along the way as you’re scraping down the sides of the bowl 🙂

Also, feel free to experiment with adding other flavors or foods to the mixture. So far I’ve tried:

  • berries
  • coconut and coconut milk
  • molasses and cookies
  • sunbutter (which was heaven for me—it’s funny, though, that the combination of the two oxidized to create an unappetizing grey color to whatever parts were exposed to air)
  • chocolate
  • OMG pumpkin!
So if you haven’t tried this little experiment yet and are fond of bananas, you’re missing out! Perhaps it, too, will satisfy your late-night ice cream urges.

One Ingredient Banana Ice Cream

Arame Purple Cabbage Slaw with Tahini Goddess Dressing

Arame Slaw

Spring has apparently sprung (or was bypassed in favor of summer?) for my dear friends and family in Michigan where they’ve been enjoying record high temperatures. Even though it’s still possible that they’re in for a good Mother’s Day snowstorm (it wouldn’t be the first time!), for now they can savor the warm weather and perhaps enjoy the colorful fresh veggies spring has to offer like this favorite slaw of mine.

Arame

In general, I’m actually not a huge fan of seaweed. The strong fishy flavor is usually what turns me off to it. I do enjoy sushi rolls occasionally, but even the nori on rolls can be a tad too strong sometimes (I know, I’m weird, right?!). I’ll still eat them, but there’s something about that flavor that can be so offensive to me. And that’s what I love about arame because it lacks that distinct fishy flavor and is one of the most mild sea veggies there is.

Above you’ll see the lovely arame in it’s dried form and this is what you’ll be looking for when you purchase it at the store. For this recipe, you’ll want to pull it out of the bag and cover it with warm water to soak for at least 15 minutes.

While your arame is soaking, chop the veggies and make the Tahini Goddess dressing. Before moving on, I have to stop right here and mention that this dressing is possibly my all-time favorite. In college I used to purchase Annie’s Goddess dressing at my local co-op before learning how to easily make my own homemade version of it. The homemade version is just as good, if not better (and doesn’t use any extra oil!), if I dare say so myself. 🙂

Once you’ve chopped your veggies and placed them into a large mixing bowl you’ll have this beautiful rainbow of colors.

Vegetable Bowl

After the arame has soaked for at least 15 minutes it will look like this. You then want to strain it with a sieve and squeeze out (with your hands) as much excess water as you can before adding it to the rest of the salad.

Soaking Arame

Toss all of the veggies including the arame together and then add the tahini sauce and toss again until everything is well coated and the dressing is evenly distributed. Easy peasy, hey? At this point you’re done and ready to enjoy!

Arame Slaw

Arame Purple Cabbage Slaw with Tahini Goddess Dressing

Ingredients

  • 1 small head purple cabbage, chopped into small strips
  • 1 large carrot, shredded
  • 1 red bell pepper, cut into thin slices and halved
  • 2 scallions, white and green parts thinly sliced
  • 2 cups dried arame

Tahini Goddess Dressing

  • 1 clove garlic
  • 2 tablespoons tahini (roasted or not roasted—either works just fine)
  • 1 tablespoon soy sauce (tamari, shoyu, or Bragg liquid aminos—whatever you prefer)
  • 1/4 cup fresh squeezed lemon juice
  • 1/4 cup water
  • salt and pepper to taste

Soak Arame: Place the arame in a medium bowl and cover with very warm water. Let it soak for a minimum of 15 minutes. It always takes me a bit longer to prep the rest of the veggies and tahini sauce so I just let the arame soak until I’ve completed all of that.

Chop Veggies: While the arame is soaking, chop all of your veggies and place them in a large bowl.

Make Dressing: Place all of the dressing ingredients in a mini food processor or blender and blend until completely smooth.

Assemble: Toss the veggies and arame together in the bowl and then drizzle the dressing and toss again until all veggies are evenly coated with the dressing.